Alcohol Ink & Foil Bees
Today, I’m bringing the sunshine inside with airy alcohol inks, foil, and happy bees from The Hedgehog Hollow February kit.

If we haven’t met, hello, I’m Amber Rain Davis. I’m an Altenew Educator and Certified Zentangle Teacher and I love to create, share, and inspire. This is my first Hedgehog Hollow post and I’m thrilled to be here! So lets’ get started!
Alcohol Inks on Photo Paper
I started by making two alcohol ink panels. If you have alcohol ink panels laying around you can definitely use those! I ran out of Yupo paper, so I cut an 8.5 x 11 piece of Costco Photo paper in half and tested the inks on the front and back of the paper.

The backside is definitely where you want to play with inks! Inks move beautifully on the back and absorb into the front. I didn’t see an appreciable difference between the backside of the photo paper and Yupo paper which is awesome, because I’ve got a whole ream of photo paper!
The video below shows the process of making alcohol ink panels, foiling the panels and chipboard pieces, and card assembly so definitely check it out!
All the details are in the video, so I’ll share the highlights and tips here. I used Ranger Alcohol Inks in the following colors:
Yellow panel: Sunshine Yellow, Lemonade, Salmon
Blue panel: Aqua thinned with a lot of rubbing alcohol
Before the alcohol ink fully dries, press Ranger Vintage Foil Sheets into the sticky areas to transfer the foil. If your ink is too dry for the foil to stick, add more alcohol ink or use a glue pen to create tacky areas.

Card Assembly
- Emboss an A2 size piece of white cardstock
- Die cut the bee elements from alcohol ink panels and Curious Metallic Night cardstock from CutCardStock.com
- Glue the bee elements together
- Stamp and fussy cut a sentiment
- Pop up the bee and sentiment with dimensional adhesive
- Embellish with Nuvo Ebony Black Crystal Drops
Foiled Chipboard Bees
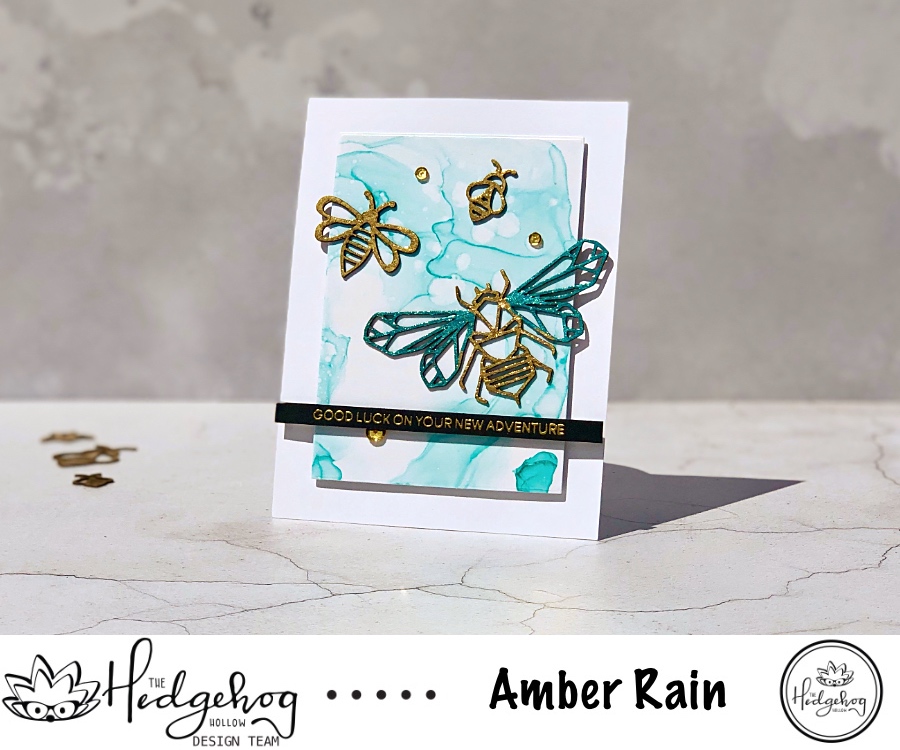
For the next card, I used a large Nuvo Glue Pen to add adhesive to the chipboard pieces. This glue pen is AWESOME! Due to the extra broad tip, it was quick and easy to apply the adhesive to these intricate pieces.
Allow the glue to dry until tacky and foil one wing at a time. Burnish the foil with a bone folder and gently peel off the foil. Foil the bee’s body and two additional bees with gold foil.
Card Assembly
- Stamp and gold heat emboss a sentiment on a black strip of cardstock
- Pop up the inked panel and sentiment strip with dimensional adhesive
- Adhere the elements and embellish with sequins
I love the delicate shadow the wings cast and that’s a wrap! I hope these projects inspire you to pull out your alcohol inks and foil and make something pretty. Thanks so much for stopping by today! Be creative and Breathe · Ink · Inspire.
Supplies


2 Comments