Altenew Educator Level 1 Challenge
This is the final challenge for my Level 1 Certification for the Altenew Educator Certification Program. Yay!
The Challenge
Select any 3 components from Level 1 classes, create a masculine card & feminine card. The cards can be similar or completely different. Challenge accepted!

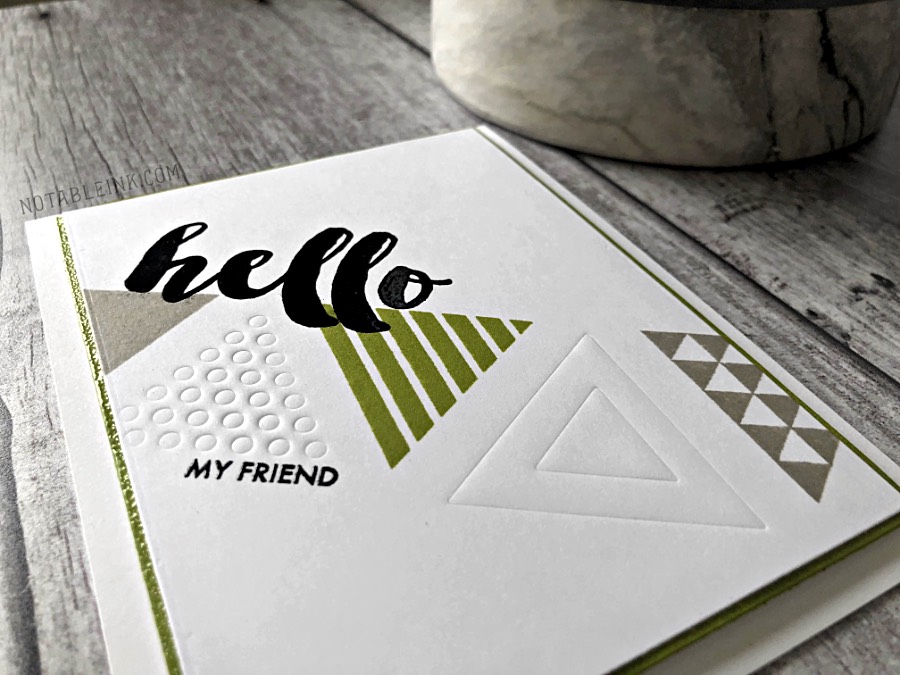
The Altenew Trigonometry Stamp & Die Bundle inspired this Clean & Simple diagonal card design. Techniques were used from Clean & Simple Boutique Cards, Easy Die Cutting Techniques, and Let It Shine.
I started the masculine card by alternating 3 triangle stamps with 2 dies, laying them out in a diagonal across an A2 sized card front. The dies were used to dry emboss the patterns in the cardstock.
Tip: play around with your cutting pads, embossing pads, and platform to find the right sandwich for the depth of dry embossing desired. Once you’ve found the right combination label your stamp pocket with the combo.

Subtle shine was added by clear heat embossing the sentiments. The script hello is from Altenew Golden Feather stamp set and my friend is from Avery Elle Sentimental.
I needed to bring in the green one more time and didn’t have cardstock to match so I used a 4th technique from Irresistible Inking Techniques. I cut a piece of cardstock 1/8 inch larger than the card front and coated the edges with Altenew Crisp Dye Ink and then clear heat embossed it for some shine.
I was really happy with how this masculine card came out. Now on to the feminine card!

I wanted to keep the diagonal design concept going to unify this his & hers set. For a feminine vibe I used flowers vs. geometrics. The first step was to use Altenew Wood Pallet Background to add diagonal planks.
I spent quite a bit of time aligning my post-it tape masks and stamp so that the plank edges and masked area would be just right. Once I finally got it all lined up I accidentally inked up the stamp in black when I intended to use a cool grey.
I was definitely not starting over, some good quality 40 lb vellum came in handy to diffuse the stark black planks.

Next I die cut 3 happy sentiments from medium grey cardstock with Honey Bee Stamps Hello Honey Cuts, glued them together in a stack, and clear heat embossed them for shine.
Three flowers from Altenew Painted Flowers Stamp set were stamped and clear heat embossed on vellum. I Copic colored the flowers with 2 shades of pink on the backside of the vellum.

Tip: dye ink beads up on vellum because the surface is non-porous. Copic coloring the backside is a great alternative to add color.
The birthday sentiment from Altenew Trigonometry was stamped and clear heat embossed. A piece of cardstock 1/8 inch larger than the card front was inked with matching Altenew Crips Dye Ink and clear heat embossed to tie in the pop of pink and finish off the card.
Participating in the Altenew Educator Certification Program has been a fantastic experience! I thoroughly enjoyed this final Level 1 challenge and can’t wait to get started on Level 2. Thanks for stopping by. Breathe · Ink · Inspire
Supplies


