How To Heat Emboss Backgrounds Two Ways
Learn how to heat emboss backgrounds two ways. The first way uses a unique Altenew background stamp. Use any of your silhouette stamps for the second technique.

All the details to heat embossing backgrounds two ways are in this short card making video tutorial. Watch here or in HD on YouTube. While you’re there I’d love it if you like, subscribe, and share with friends.
If you enjoyed this video or learned something new, please show your appreciation.
Subscribe to my YouTube channel.
Emboss Backgrounds Two Ways
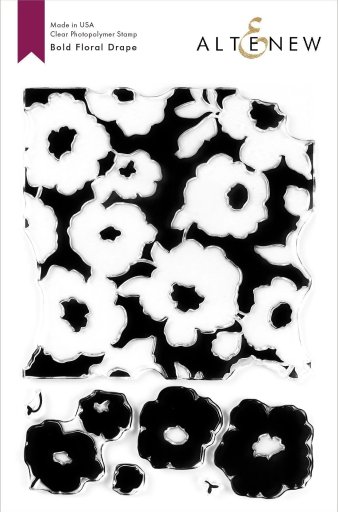
Altenew Bold Floral Drape Stamp Set
The first technique uses a unique background stamp. Altenew Bold Floral Drape Stamp Set features a stamp for the negative background space and individual floral images.

Altenew Bold Floral Drape Stamp Set made it really easy to get the look I was going for. For the background, I used WOW! Alexandra Renke Bella’s Forest. This green lightens up to a medium muted green when embossed. Such a beautiful and unexpected color!

For the flowers, I used WOW! Alexandra Renke Manuela’s Honey (yellow) and Kerstin’s Magic (purple). Each one of the powders includes a translucent color and white ultra high embossing powder. As you can see in the card above, Ultra-high, large white granules, create the speckled appearance.
This is a super cool effect. Make sure you watch the video for tips on how to emboss effectively with ultra-high embossing powders.

Altenew Zig Zag Floral Stamp Set
As I said, Altenew Bold Floral Drape Stamp Set made it really easy to get the look I was after. But not everyone has a stamp like this, so I recreated the look with a non-background floral stamp set.

Layer stamp sets are great options for this type of design because they include solid stamps, detail stamps, and typically outline stamps too. I searched my stash and chose a set with silhouette images including some recognizable detail. Altenew Zig Zag Floral fit the bill.

In the first card, I stamped the background first. However, with the second card’s technique, we have to work from front to back with masking. That means flowers, then leaves, then the background.
First, heat emboss the flowers leaving enough space for leaves and background space. Second, use the coordinating die set or fussy cut masks for the flowers and leaves. Third, cover the flowers and stamp and emboss leaves with clear or white embossing powder.

Cover the leaves with masks (flowers are already covered) and press the embossing ink pad over the entire panel. Remove masks, sprinkle on the embossing powder, and heat set. Here I used WOW! Alexandra Renke Tschenny’s Sky embossing powder.
Masking the floral elements will create the white space around the flowers and leaves to separate them from the background. I had some patchy areas in the background so I replaced the flower masks and ink blended over the background and leaves with blue ink. This added blue detail to the leaves which helped them pop.
Do let me know what you think in the comments here or on YouTube.
・・・ Thank You ・・・
Thanks so much for spending a few minutes with me today! If you love what you see, show your appreciation by following me here and on YouTube, Instagram, and Pinterest.

Embossed Backgrounds
Need a little more heat embossed background inspiration?
Check out this video/post where I create tropical backgrounds two ways.
If you love it, pin it, and share it with your crafty friends! Visit me on Pinterest for more design inspiration, patterns, and color combinations.

Supplies
If you fancy supporting my blog and YouTube channel, please use these compensated affiliate links at no cost to you. I earn a small commission from qualifying purchases. Thank you for your support which helps me host my blog and bring you new content!


